DIY Leather Steampunk inspired Corset-Belt tutorial.
A couple of weeks ago, the weather in Norway was super hot and summery, which is something that has not happened in the last four years. Everyone (except me) was happy for all the sun and heat out there... People were enjoying the weather, walking around in bikinis... sun bathing on the grass in the middle of downtown... the pubs and restaurants were full, the city was once again ALIVE after the long dark winter.
But as soon as people barely started getting used to the heat that a cold wave hit the coutry, first starting with cold northern winds... but it was not cold enough to go back to winter clothing. It's the most annoying type of weather when you don't really know what to wear! If you dress up in summer clothes, you'd freeze, if you dress up in winter clothes, you'd suffocate!
So, to keep a long story short, I tried to find a healthy balance by making myself a corset made of leather. Why, you may ask? Well my tummy and waist area have always been a weakness point when it comes to the cold... even if I am wearing a heavy coat and my waistline is feeling the cold, I would still get ill.
So, on a Saturday for which I had plans on staying out in the cold for many hours during a local festival, I decided to make myself a thick protective steampunk style inspired corset/belt!
If you are a fan of those, here's the simplest and fastest way to make one that fits your body!
First, you will need a good rigid piece of leather. I used a 3,5 mm cowhide back piece.
Then you need to decide the width you want it to be. I just went for an underbust 25 cm wide belt, as my aim was to cover my stomach and my upper belly.
Then you need to find yourself buckles and some heavy duty waxed linen thread, and follow my pattern below.
1.
I started off by cutting all the pieces and dying the leather with an all natural paste that I prepared with plants, fruits and herbs which gave it this lovely brassy colour.

2.
I punched holes in the leather where the pieces were to be sewn together.

3.
I marked where I wanted the buckles to go. I placed the first one at 4 cm from the edge, the 2nd at 5cm and the 3rd at 6 cm.


 4.
4.
You don't have to use this type of belt buckles, but those just happened to be the only small copper ones I found at the time, and it was a bit tricky to get them in place as I did not want to use any studs.
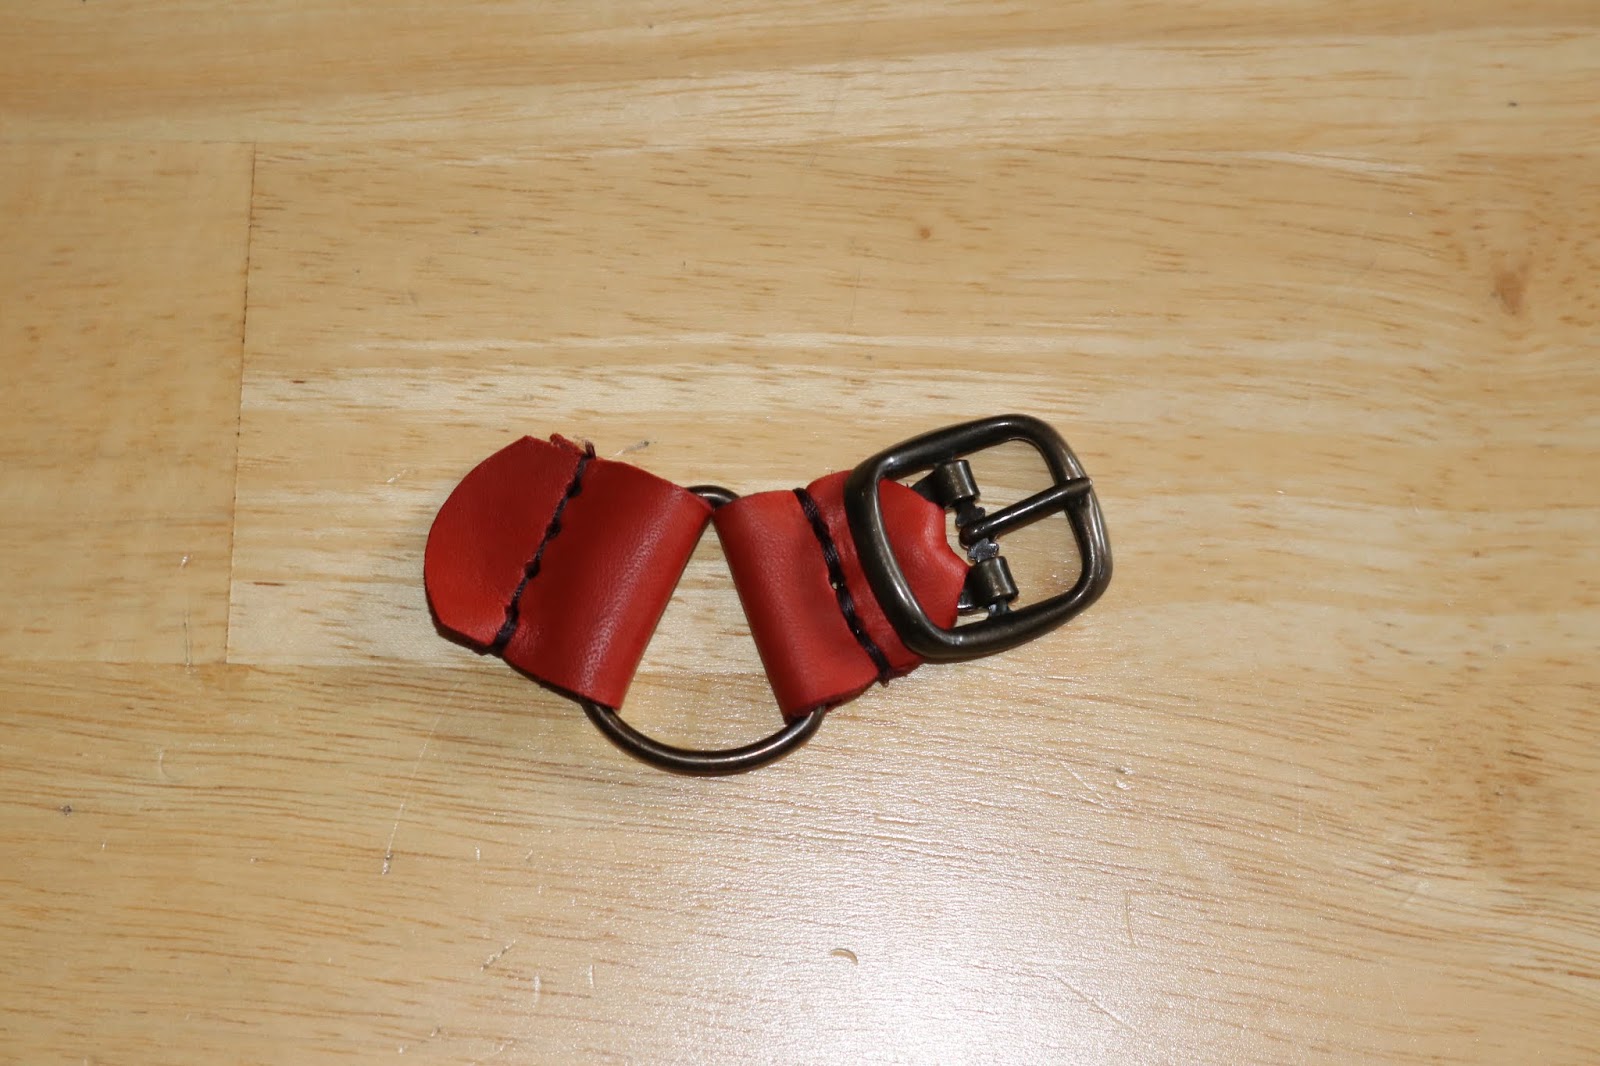
5.
I connected them to a D ring piece for flexibility as shown in the pictures above and below.

6.
When I was done with that, it was time to sew on all the buckles in place!


7.
After the buckles were sewn on, I finished off by sewing the belt pieces in place, also making sure I do the same edge distance thing but in the opposite order this time. (Just in case I got larger/thinner later on, so I'd have some space to tighten/loosen).
As the leather was drying, I noticed the color result was too much on the orange/tangerine side... and I honestly did not like how flashy it was. So I dyed it again with a new darker mix, and I got this lovely old red-brown stained look. I went for darker around the edges and left some lighter spots in the middle so it would give it that beautiful aged look.


8.
I put the corset on to see how much leather I will need to remove from the back side so it would fit my curves. I decided that this V shaped piece of leather would have to go!
I then punched holes in the cut sides of the leather and laced them up tightly together with burgundy thick thread to match the leather color.


The corset/belt should look more like a V than a straight line when you're done putting the pieces together.

This is what the finished product looked like. It was still dark as it was not fully dry yet.

9.
And here's me in the final product out in the sun, to show you the final color result!
Remember, you don't need to go darker than this. The leather will get darker on it own with age.
This whole process took me around 2,5 hours. But it was well worth it!
Thank you for checking out my blog, if you're interested in placing an order, you can find my work on the Facebook group:
"Handmade in Norway - by Wenetela Wolf"
If you have any questions or suggestions, please leave them in the comment section below!


Comments
Post a Comment